Is your tap water tasting a little off lately? Maybe you've noticed a decline in water pressure, or perhaps, heaven forbid, you've spotted a leak around your water filter system. Don't panic! A faulty water filter housing might be the culprit, and thankfully, replacing it is often a straightforward DIY project you can tackle yourself.
Dealing with home maintenance can feel overwhelming. The thought of wrestling with plumbing, unsure of where to start or what tools you need, is enough to make anyone want to call a professional. But replacing a water filter housing doesn't have to be one of those daunting tasks. It's more manageable than you might think.
This guide will walk you through a simple, step-by-step process for replacing your water filter housing. We'll cover everything from gathering the necessary tools and preparing your workspace to safely removing the old housing and installing the new one. By following these instructions, you can restore your water quality and pressure with confidence, saving time and money in the process.
In this article, we'll explore the ins and outs of water filter housing replacement. We'll start with a personal anecdote, then dive into the process, the history and myths surrounding it, hidden secrets, and offer recommendations. We'll also cover tips, fun facts, and address common "what if" scenarios. Let's get started!
Why Replace Your Water Filter Housing?
Okay, so I remember the first time I had to deal with this. I was living in an older house, and one day, I noticed a slow drip coming from under the kitchen sink. Turns out, the water filter housing had cracked. I initially panicked, thinking it was a major plumbing disaster. I called a plumber, got a quote that made my eyes water, and then decided to do some research. I quickly realized it wasn't as complicated as I thought. With a little guidance, I was able to replace the housing myself, saving a significant amount of money! The key reason for replacement often stems from physical damage like cracks due to age, wear, or even accidental impact. Leaks are a prime indicator, and if left unattended, they can lead to water damage and mold growth. Another reason is performance degradation. Over time, the housing material can become brittle and less effective at maintaining a tight seal, even without visible cracks. This can compromise the filtration process, allowing unfiltered water to bypass the filter itself. Finally, sometimes it's simply about upgrading to a better model with improved features like higher flow rates or a more robust design. The water filter housing is a crucial component of your water filtration system, ensuring that the water passing through is properly filtered before it reaches your tap. Replacing it when necessary is essential for maintaining water quality and preventing potential plumbing problems. A damaged or leaking housing can compromise the effectiveness of your filtration system, potentially exposing you and your family to contaminants in your drinking water. Regular inspection and timely replacement can help you avoid these risks and enjoy clean, safe water. It's also important to note that some housings may be more prone to failure than others, depending on the material they're made from and the water pressure in your home. Consider investing in a high-quality housing made from durable materials to ensure long-lasting performance.
Understanding Water Filter Housing Replacement
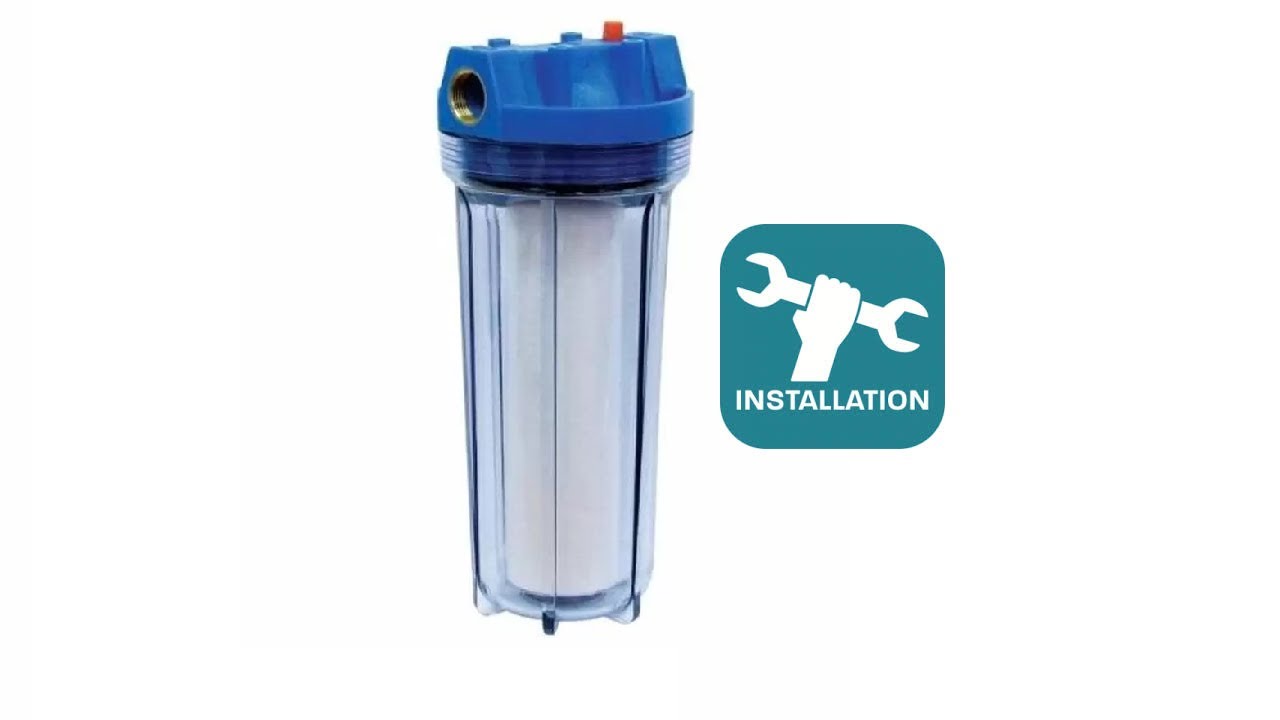
Water filter housing replacement is essentially the process of swapping out the existing enclosure that holds your water filter cartridge with a new one. This is usually necessary when the old housing becomes damaged, cracked, or starts leaking. The housing provides a sealed environment for the filter to work effectively. It connects to your water line and directs water through the filter cartridge, removing sediments, chlorine, and other impurities. The replacement process usually involves turning off the water supply, disconnecting the old housing, attaching the new housing, and turning the water back on. Before starting, it's crucial to identify the correct type of housing for your filter system. Housings come in various sizes and configurations, so matching the new one to the old one is critical for a seamless fit. The replacement process is generally straightforward, but it's important to follow the manufacturer's instructions carefully to avoid any leaks or damage to your plumbing. Regular maintenance, such as replacing the filter cartridge on schedule, can extend the lifespan of the housing. However, even with proper care, housings can eventually wear out or become damaged, necessitating replacement. Choosing a high-quality replacement housing can also contribute to the overall performance and longevity of your water filtration system. When selecting a new housing, consider factors such as the material it's made from, its pressure rating, and its compatibility with your existing plumbing. A durable and well-designed housing will provide years of reliable service and ensure that your water filtration system continues to deliver clean, safe water.
History and Myths of Water Filter Housing Replacement
Believe it or not, water filtration has a long history, dating back to ancient civilizations. The Egyptians used rudimentary filters to purify water, and the Romans constructed aqueducts to bring fresh water into cities. While early filtration methods were simple, the concept of removing impurities from water has been around for centuries. Modern water filter housings, as we know them, are a relatively recent invention, evolving alongside advancements in plumbing and materials science. The myth that all water filter housings are created equal is simply not true. There are significant differences in quality, durability, and performance. Some housings are made from cheap plastic that can crack easily, while others are constructed from high-quality materials designed to withstand high pressure and temperature. The myth that you need a plumber to replace a water filter housing is another misconception. While it's always a good idea to consult a professional if you're unsure, the replacement process is often straightforward enough for a DIYer to handle. Another common myth is that replacing the filter cartridge is enough to maintain your water filtration system. While regular filter replacement is essential, the housing itself can also degrade over time and may need to be replaced to ensure optimal performance. Another interesting fact is that the design of water filter housings has evolved significantly over the years, with manufacturers constantly innovating to improve their efficiency and ease of use. Some modern housings feature quick-connect fittings that make filter replacement a breeze, while others are designed to minimize water pressure loss. The history and myths surrounding water filter housing replacement highlight the importance of understanding the technology and making informed decisions about your water filtration system. By dispelling these myths and learning about the history of filtration, you can ensure that you're providing your family with clean, safe drinking water.
Hidden Secrets of Water Filter Housing Replacement
One of the biggest secrets about water filter housing replacement is that prevention is key. Regularly inspecting your housing for cracks, leaks, or signs of wear can help you catch problems early before they escalate into major issues. Another hidden secret is the importance of using Teflon tape or pipe dope on the threads when connecting the new housing to your plumbing. This helps to create a watertight seal and prevent leaks. Many people don't realize that the type of water you have can affect the lifespan of your filter housing. Hard water, which is high in minerals, can cause scale buildup inside the housing, leading to reduced performance and eventual failure. Installing a water softener can help to prevent this problem and extend the lifespan of your filter housing. One lesser-known fact is that some water filter housings come with a built-in pressure relief valve. This valve allows you to release the pressure inside the housing before removing the filter cartridge, making the replacement process easier and safer. Another secret is that the orientation of the housing can affect its performance. Most housings are designed to be installed vertically, with the filter cartridge hanging down. Installing the housing horizontally can reduce the flow rate and make it more difficult to replace the filter cartridge. Another important secret to consider when replacing your water filter housing is to ensure you have the correct replacement o-ring or sealing ring. These rubber rings create a water tight seal between the housing and the filter bowl. Over time, these o-rings can become brittle or damaged, leading to leaks. Always replace the o-ring when you replace your water filter housing to ensure a proper seal. By uncovering these hidden secrets, you can take steps to prolong the lifespan of your water filter housing and ensure that your water filtration system continues to provide you with clean, safe drinking water.
Recommendations for Water Filter Housing Replacement
When it comes to water filter housing replacement, I always recommend investing in a high-quality housing made from durable materials. Look for housings that are certified by organizations like NSF International, which ensures that they meet strict standards for safety and performance. I also recommend choosing a housing that is compatible with your existing filter system. This will ensure a seamless fit and prevent any compatibility issues. Another recommendation is to consider the size of the housing. If you have a large family or use a lot of water, you may want to choose a housing that can accommodate a larger filter cartridge. This will extend the lifespan of the filter and reduce the frequency of replacements. It's also important to choose a housing that is easy to install and maintain. Look for housings with quick-connect fittings and a simple design that makes filter replacement a breeze. Another recommendation is to purchase a water filter housing wrench. This tool makes it easier to remove and install the housing without damaging it. I also recommend keeping a spare housing on hand. This way, if your current housing fails, you can quickly replace it without having to wait for a new one to be shipped. A great recommendation is to consider a clear water filter housing, which allows you to visually inspect the filter cartridge without having to remove the housing. This can help you determine when it's time to replace the filter and ensure that your water filtration system is always working at its best. By following these recommendations, you can ensure that you choose the right water filter housing for your needs and enjoy clean, safe drinking water for years to come.
Tools and Materials Needed for Replacement
Before you even think about touching that old filter housing, gather your supplies. You'll need a new water filter housing that's compatible with your existing system, a housing wrench (often included with the new housing, but buy one if it isn't), Teflon tape, a bucket to catch any spills, and maybe even a towel or two. Optional, but highly recommended, are shut-off valves near your filter system. If you don't have these, be prepared to shut off the main water supply to your home. This means no water anywhere until the job is done! Also, consider having a pipe cutter and some fittings on hand, just in case you need to make any minor adjustments to your plumbing. The biggest challenge is ensuring you have the correct replacement housing. Measure the old one carefully and check the thread size to ensure a proper fit. Don't assume they are all the same – there's a surprising amount of variation. Getting the wrong one will mean a frustrating trip back to the hardware store. Once you have all your tools assembled, take a deep breath and familiarize yourself with the instructions that came with your new housing. Understanding the steps before you start will save you time and potential headaches later on. Also, remember to check for any visible damage to your existing plumbing before you begin. If you spot any corrosion or leaks, it's best to address those issues before installing the new housing. Sometimes, a simple housing replacement can turn into a larger plumbing project, so it's always good to be prepared.
Tips for a Smooth Water Filter Housing Replacement
Here are some helpful tips to make your water filter housing replacement go as smoothly as possible. First, always turn off the water supply before you start working. This will prevent any unwanted floods and make the job much easier. Second, use a bucket to catch any water that may spill out when you disconnect the old housing. This will help to keep your workspace clean and dry. Third, use Teflon tape on the threads of the new housing to create a watertight seal. This will prevent leaks and ensure that your water filtration system works properly. Fourth, don't overtighten the housing. This can damage the housing and make it difficult to remove in the future. Fifth, make sure to properly dispose of the old housing. Some housings may contain contaminants that could be harmful to the environment. Another tip is to take pictures of the old housing before you remove it. This will help you to remember how it was installed and make it easier to install the new housing. Also, be sure to check the O-ring on the new housing. Make sure it's properly seated and lubricated with a food-grade silicone grease. This will help to ensure a tight seal and prevent leaks. Another important tip is to flush the new housing with water before you start using it. This will help to remove any debris or contaminants that may have accumulated during manufacturing or shipping. By following these tips, you can ensure a smooth and successful water filter housing replacement.
Step-by-Step Guide to Replacing Your Water Filter Housing
Okay, let's get down to the nitty-gritty. First, shut off the water supply! I cannot stress this enough. Then, relieve any pressure in the system. Most housings have a small red button you can press to release trapped water. Now, using your housing wrench, carefully unscrew the old housing. Be prepared for some water to spill, even if you relieved the pressure. Once the old housing is off, clean the threads on the connecting pipes. Wrap the threads of the new housing with Teflon tape, applying it in the direction of the threads. Screw the new housing onto the pipes, tightening it snugly with the wrench. Don't overtighten! Once the housing is secure, slowly turn the water supply back on. Check for leaks around the connections. If you see any leaks, tighten the housing slightly or reapply Teflon tape. Once you're sure there are no leaks, flush the system by running water through it for a few minutes. This will help to remove any air or debris that may be in the system. Finally, install a new filter cartridge into the housing, following the manufacturer's instructions. And that's it! You've successfully replaced your water filter housing. Remember to monitor the system for any leaks in the days following the replacement. It's always a good idea to double-check your work and make sure everything is functioning properly. And if you're ever unsure about any step of the process, don't hesitate to consult a professional plumber.
Fun Facts About Water Filter Housing Replacement
Did you know that some water filter housings are designed to withstand extreme temperatures? These housings are often used in industrial applications where water is heated to high temperatures. Another fun fact is that the first water filters were made from sand and gravel. These filters were used to remove sediment and debris from water. The materials used in water filter housings have evolved significantly over the years. Early housings were made from metal, but modern housings are typically made from plastic or composite materials. Water filter housings come in a variety of shapes and sizes. Some housings are designed to be installed under the sink, while others are designed to be installed on the main water line. Replacing your water filter housing can actually improve your water pressure. A clogged or damaged housing can restrict water flow, leading to reduced water pressure. Did you know that some water filter housings have a built-in timer that reminds you when it's time to replace the filter cartridge? This is a convenient feature that can help you stay on top of your water filtration maintenance. Another fun fact is that the lifespan of a water filter housing can vary depending on the type of water you have. Hard water, which is high in minerals, can shorten the lifespan of the housing. Replacing your water filter housing can actually save you money in the long run. By ensuring that your water filtration system is working properly, you can reduce your risk of plumbing problems and water damage. Finally, replacing your water filter housing is a great way to improve the quality of your drinking water and protect your family's health. By removing contaminants from your water, you can enjoy clean, safe, and great-tasting water.
How to Choose the Right Replacement Housing
Choosing the right replacement housing is crucial for ensuring the proper functioning of your water filtration system. Start by identifying the type of housing you currently have. Is it a standard 10-inch housing, a slimline housing, or a big blue housing? Knowing the type will help you narrow down your options. Next, consider the size of the housing. Make sure the replacement housing is the same size as your old one. This will ensure that it fits properly and that you can use the same filter cartridges. Also, consider the material of the housing. Plastic housings are typically less expensive, but they may not be as durable as metal housings. Metal housings are more resistant to cracks and leaks, but they can also be more expensive. Think about the water pressure in your home. If you have high water pressure, you'll want to choose a housing that is rated for high pressure. This will prevent the housing from cracking or leaking under pressure. Consider any special features you may need. Some housings have a pressure relief valve, which can help to prevent the housing from bursting under pressure. Others have a clear housing, which allows you to see the filter cartridge without removing the housing. Check the connections. Make sure the replacement housing has the same type of connections as your old one. This will make the installation process much easier. Consider the brand of the housing. Some brands are known for their quality and reliability, while others are not. Do your research and choose a brand that you trust. Finally, read reviews before you buy. This will give you an idea of what other customers think of the housing. By following these tips, you can choose the right replacement housing for your needs and ensure that your water filtration system is working properly.
What If Something Goes Wrong?
Even with the best preparation, things can sometimes go awry. What if you can't get the old housing off? Try using a rubber strap wrench for better grip. If that doesn't work, you might need to carefully cut the old housing off with a hacksaw, being extremely cautious not to damage the plumbing. What if you overtighten the new housing and crack it? Unfortunately, you'll likely need to replace it again. This is why it's so important not to overtighten! What if you turn the water back on and there's a leak? First, turn the water off again immediately! Then, try tightening the connections a bit more. If the leak persists, reapply Teflon tape, making sure to wrap it in the correct direction. What if you can't find the right replacement housing? Measure your old housing carefully and compare the dimensions to the specifications of the new housing. If you're still unsure, take the old housing to a hardware store and ask for help. What if you damage the plumbing while replacing the housing? This is where having some extra fittings and a pipe cutter comes in handy. You may need to cut out the damaged section of pipe and replace it with new pipe and fittings. If you're not comfortable doing this, it's best to call a plumber. Remember, if you encounter a problem that you can't handle, don't hesitate to call a professional. It's better to be safe than sorry! Having some extra towels and a bucket on standby is always a good idea, just in case there are any unexpected spills. And always double-check your work before turning the water back on to minimize the risk of leaks or other problems.
Listicle: Top 5 Reasons to Replace Your Water Filter Housing
Here's a quick listicle outlining the top 5 reasons why you might need to replace your water filter housing: 1.Cracks and Leaks: This is the most obvious reason. If you see any cracks or leaks in the housing, it's time to replace it.
2.Reduced Water Pressure: A clogged or damaged housing can restrict water flow, leading to reduced water pressure.
3.Discolored or Foul-Tasting Water: A damaged housing can allow unfiltered water to bypass the filter, resulting in discolored or foul-tasting water.
4.Old Age: Over time, the housing material can degrade and become brittle. Even if there are no visible signs of damage, it's a good idea to replace the housing every few years.
5.Upgrading Your System: If you're upgrading your water filtration system, you may need to replace the housing to accommodate the new filter cartridge. Replacing your water filter housing is a simple and effective way to ensure that your water filtration system is working properly. By addressing these issues, you can enjoy clean, safe, and great-tasting water for years to come. Regular maintenance, including filter replacement and housing inspection, can help to extend the lifespan of your water filtration system and prevent costly repairs. Don't wait until there's a major problem before taking action. By addressing these issues proactively, you can keep your water filtration system running smoothly and enjoy the peace of mind that comes with knowing your water is safe and clean. Remember to always follow the manufacturer's instructions when replacing your water filter housing and to consult a professional plumber if you're unsure about any step of the process.
Question and Answer About Water Filter Housing Replacement
Here are some common questions people have about water filter housing replacement: Q: How often should I replace my water filter housing?
A: There's no one-size-fits-all answer, but generally, inspect it annually and replace it every 5-10 years, or sooner if you notice cracks or leaks.
Q: Can I use any water filter housing as a replacement?
A: No. You need to ensure the replacement housing is compatible with your existing filter system in terms of size, thread type, and pressure rating.
Q: What happens if I don't replace my water filter housing when needed?
A: A damaged housing can leak, reduce water pressure, and compromise the effectiveness of your water filtration system, potentially exposing you to contaminants.
Q: Do I need any special tools to replace a water filter housing?
A: A housing wrench is typically needed. Teflon tape is essential for sealing the connections. Depending on your plumbing, you might need a pipe cutter and fittings.
Conclusion of Water Filter Housing Replacement
Replacing your water filter housing might seem daunting, but it's often a manageable DIY project that can save you money and ensure clean, safe water. By understanding the reasons for replacement, gathering the right tools, following the steps carefully, and addressing potential problems proactively, you can tackle this task with confidence. Remember to inspect your housing regularly, choose a high-quality replacement, and don't hesitate to consult a professional if you're unsure about any step of the process. With a little effort, you can keep your water filtration system running smoothly and enjoy the peace of mind that comes with knowing your water is protected.